Easy Lavash Bread Recipe
Nov 18, 2020, Updated Mar 08, 2026
This post may contain affiliate links.
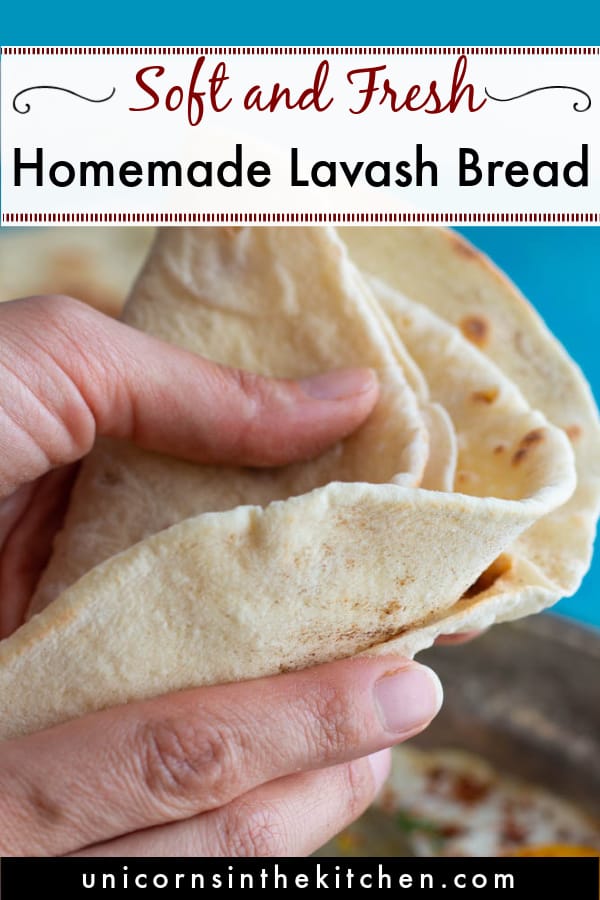
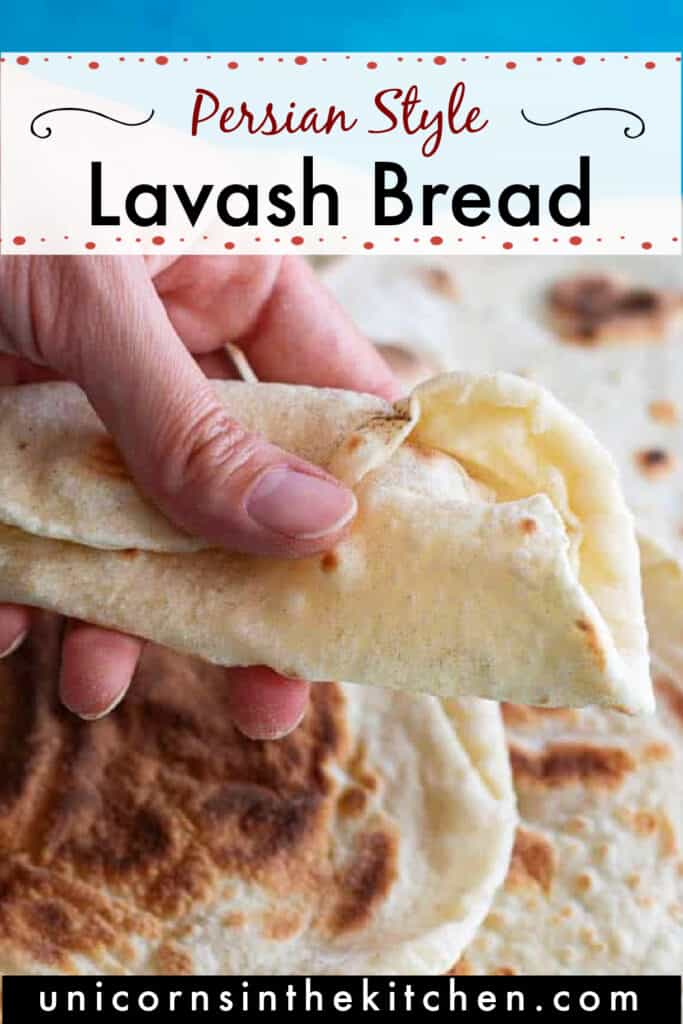
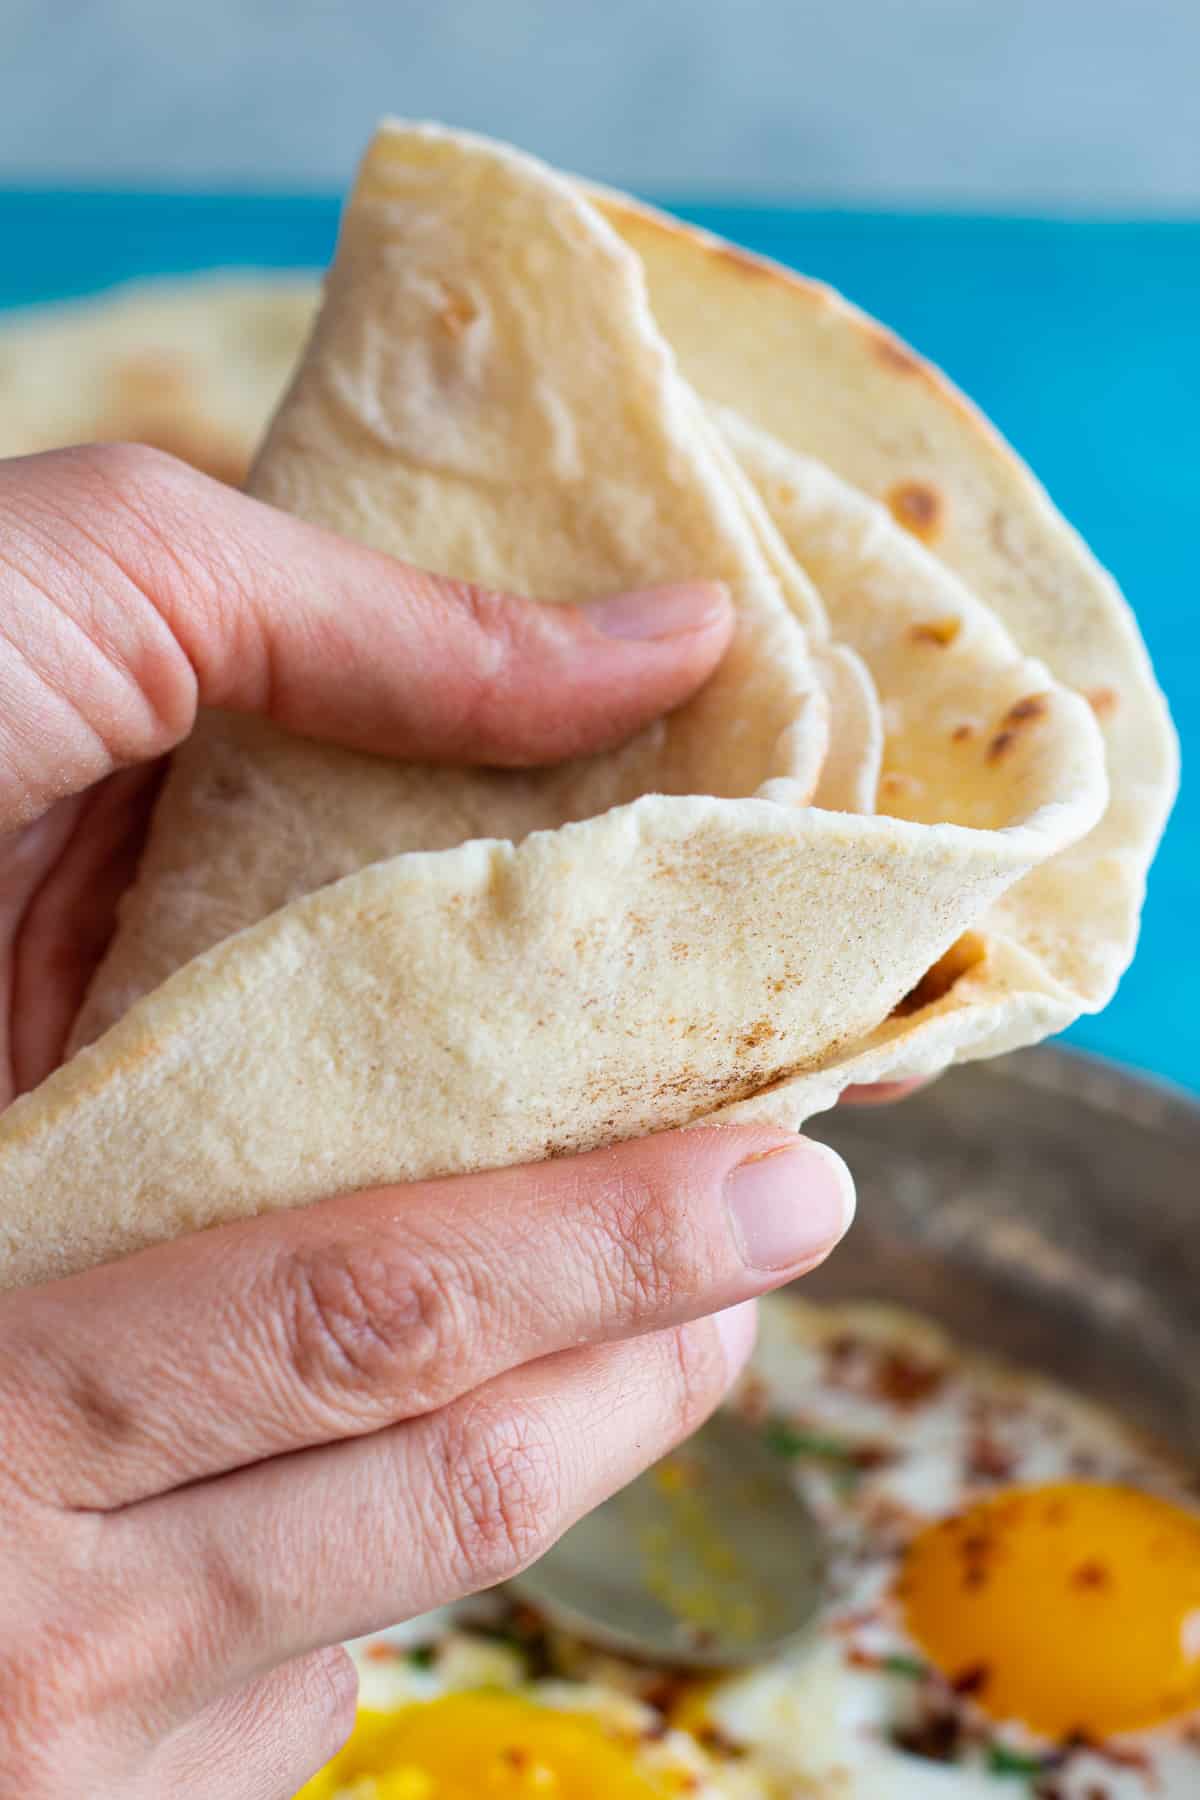
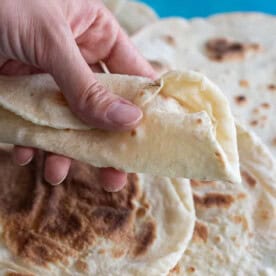
Lavash is a soft, thin flatbread that’s perfect for wraps, sandwiches, and scooping up dips – and it’s surprisingly easy to make at home. This recipe uses just 7 simple ingredients and takes about 1.5 hours from start to finish (including rising time). The dough is cooked on a stovetop pan, so you don’t even need an oven.
Lavash can be found all over the Eastern Mediterranean, Middle East, and Central Asia, including in Armenia, Azerbaijan, Iran, and of course Turkey. You’ll most often find it on breakfast tables served with cheese and eggs, wrapped around kebabs, or torn and dipped into soups and stews. Once you see how simple it is to make fresh lavash at home, you’ll never go back to store-bought!
Nothing beats warm homemade bread and I’m proud to say that we have some truly great Middle Eastern and Mediterranean breads on the blog. From our classic Persian barbari, pita, and bazlama to simit, no-yeast naan, and no-knead olive bread, it shouldn’t be hard to find a bread recipe that you like. Today I’m going to show you how to make lavash, a classic bread that’s central to many Mediterranean and Central Asian cuisines and increasingly sought out by crab-conscious eaters worldwide! Trust me, this recipe is foolproof: you don’t need any specific skills and it tastes delicious!
Table of Contents
Lavash Bread – A Simple Staple of Many Cuisines
Lavash is a soft and flat bread that can be folded easily to make sandwiches and wraps. Traditionally, lavash is made in tanoor (brick or wood oven) or on saj Tava, however, you can also use a nonstick pan or griddle to make this bread.
As for the origin of lavash, there are debates about whether the bread is originally from but most believe it’s from Armenia. However, it’s considered a regional staple and is used in various cuisines.
Ingredients
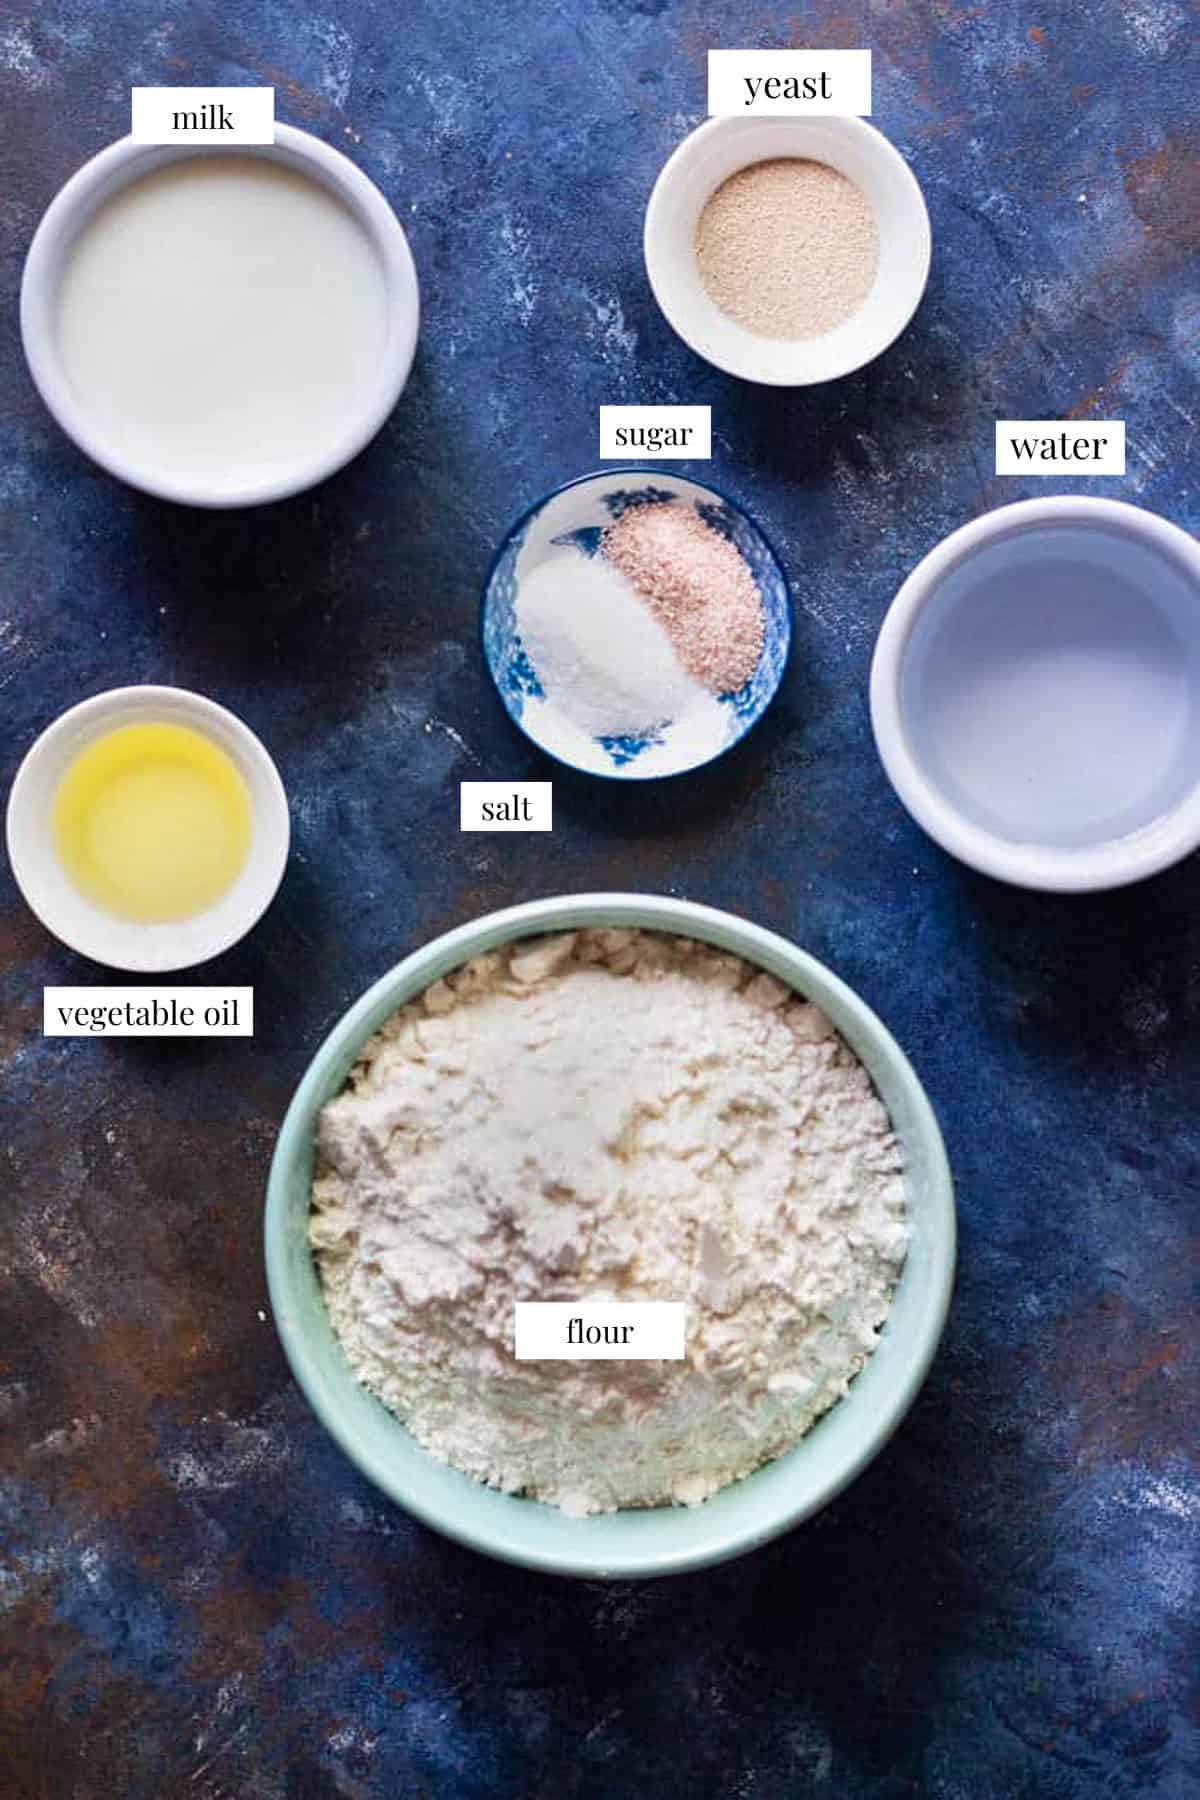
- Water and milk: Warm water and milk are the liquid part of this recipe. I use a combination of milk and water to make sure the dough is supple and soft and the flavor is perfect. It’s important the the milk and water are not too hot as it would kill the yeast or too cold and the yeast wouldn’t bloom. You can use 2% or whole milk.
- Vegetable oil: While my choice for this recipe is vegetable oil, you can use any other neutral flavored oil to make this recipe. I don’t suggest using butter since it would change the texture and flavor.
- Yeast: You can use instant or active dry yeast. If using active dry yeast, please activate it in water and milk for a few minutes before adding the rest of the ingredients.
- Flour: Regular all purpose flour works just fine for this recipe. If using whole wheat flour, don’t use more than 50% of the whole amount of flour used in the recipe since it would make the lavash dry and hard.
How to Make Lavash Bread
This lavash recipe is easy, simple and foolproof. Simply mix, rise, shape and cook! Here is a step-by-step tutorial on how to make homemade lavash.
Make the dough
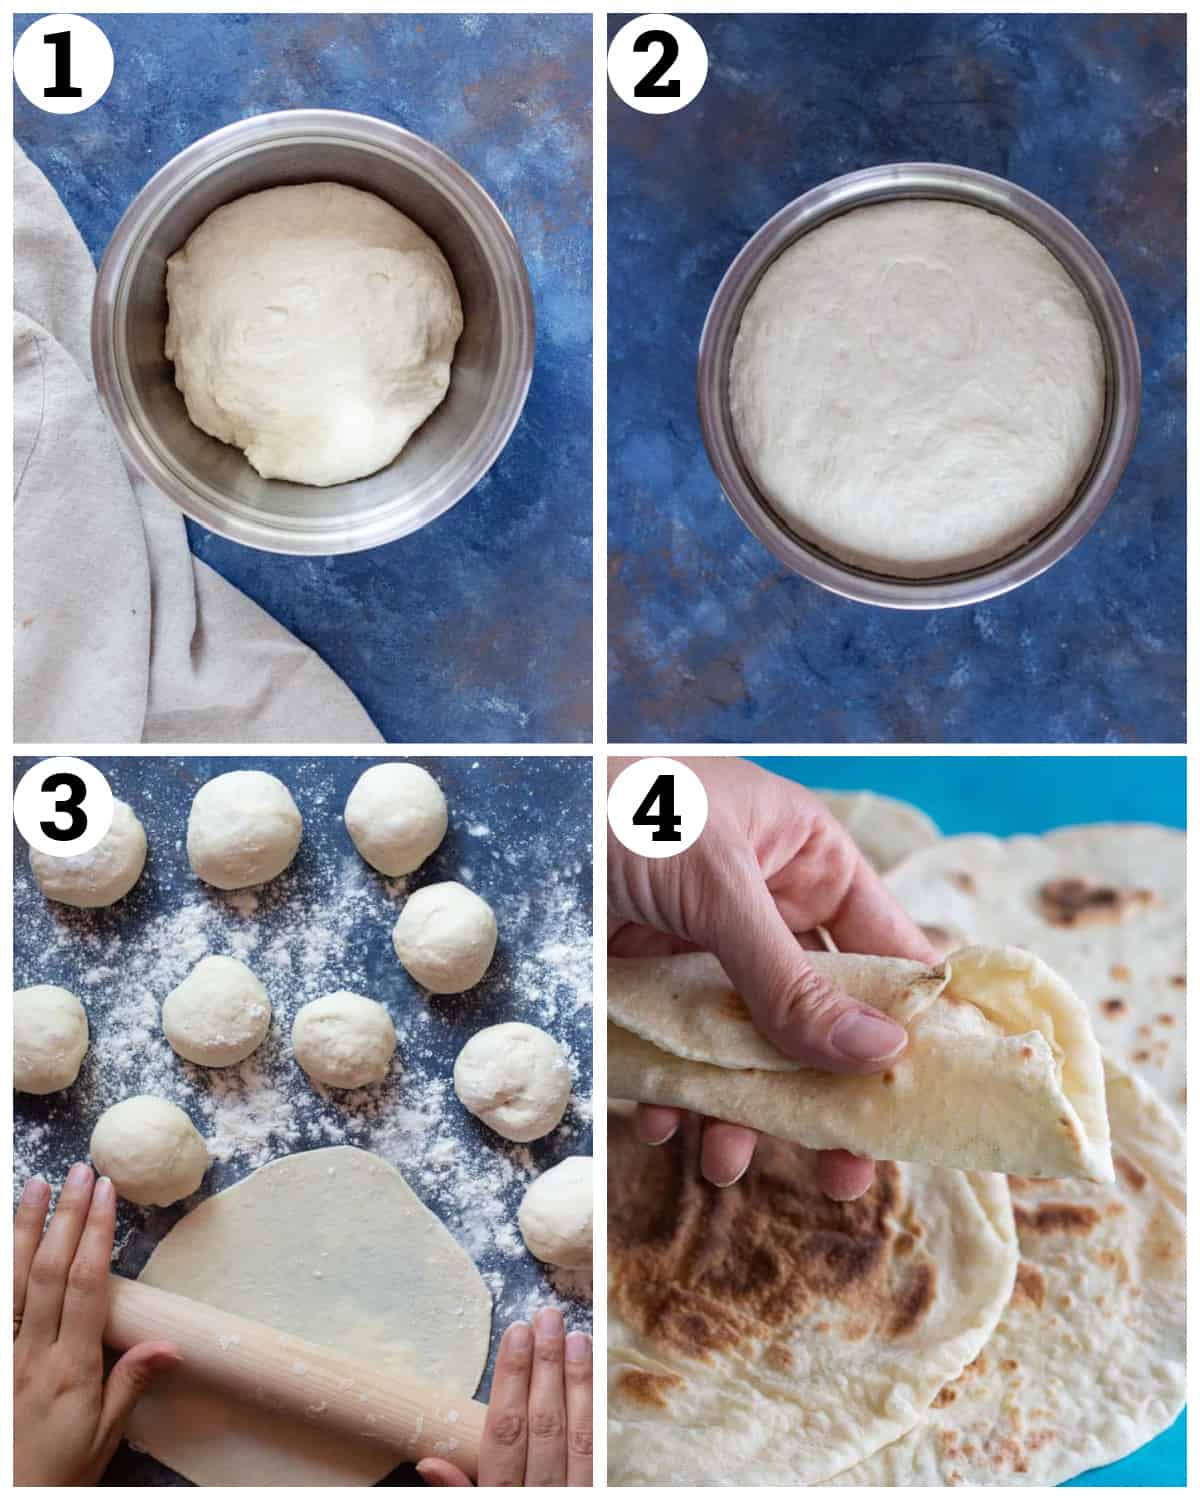
In a large bowl, mix warm water, warm milk, vegetable oil, sugar, salt and instant yeast to combine. Make sure your yeast is “instant” and doesn’t need extra time to activate.
Slowly add the flour to the water and milk mixture and mix so the dough comes together. You can use a stand mixer with a dough hook and knead for about 8 minutes until the dough comes together.
It’s also possible to make the dough by hand. Transfer the dough to a lightly flour surface and knead to about 10 minutes until it comes together. The dough will be just a bit sticky.
Rest and rise
Form the dough into a ball and rub some oil on the surface. Place it in a large bowl and cover with plastic wrap. Then leave in a draft-free place such as an off oven or microwave to rise for 40 minutes.
Shape the dough
After 40 minutes, punch down the dough gently and divide it into 10 pieces. Shape each dough into a ball and cover them all with a kitchen towel so they don’t dry. Let the dough balls sit for 15 minutes while you heat the pan.
Cook lavash in a pan
Heat a large nonstick pan over medium heat. Generously flour your surface and rolling pin. Grab one of the dough balls and cover the rest with the towel. Roll out the dough to be very thin. Place it on the pan and cook for about 45 to 60 seconds until bubbles start to appear. Flip and cook on the other side for 45 seconds until it’s fully cooked. Transfer to a plate and cover with a kitchen towel. Repeat with the remaining dough balls.
3 Tips to Make the Best Lavash
- Always keep a towel on the dough balls while rolling them out one by one. If not covered with a towel, the balls will develop a hard surface which would prevent the bread from bubbling.
- Make sure you dough is kneaded well. It should feel supple and soft but not too sticky. Avoid adding more flour than what is intended in the recipe.
- Keep a plate and a kitchen towel on the counter for the lavash breads that are cooked. Place each cooked lavash on the plate and immediately cover with a towel to avoid drying out. You can stack them.
Serving suggestions
Lavash is one of the most versatile breads and there are so many things you can do with it. Here are a few suggestions:
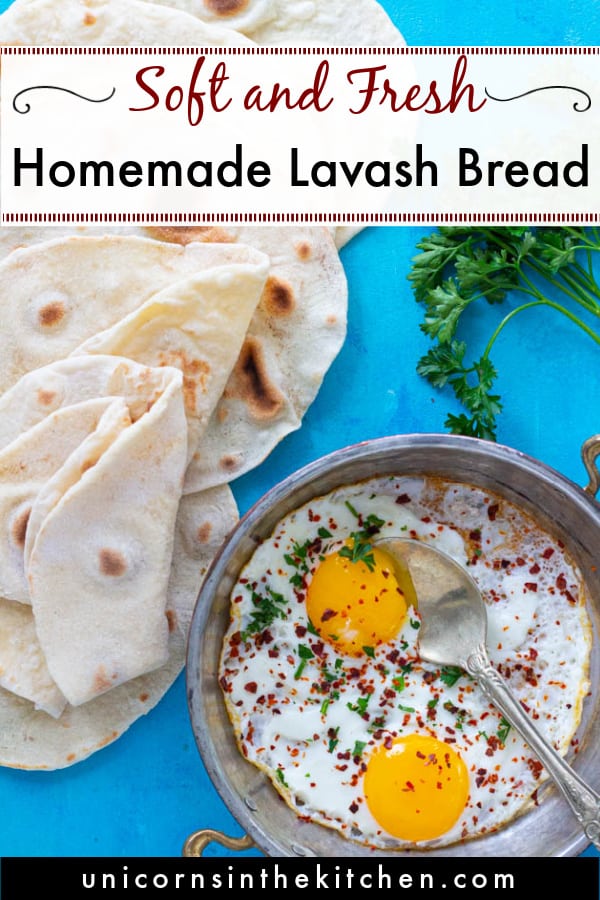
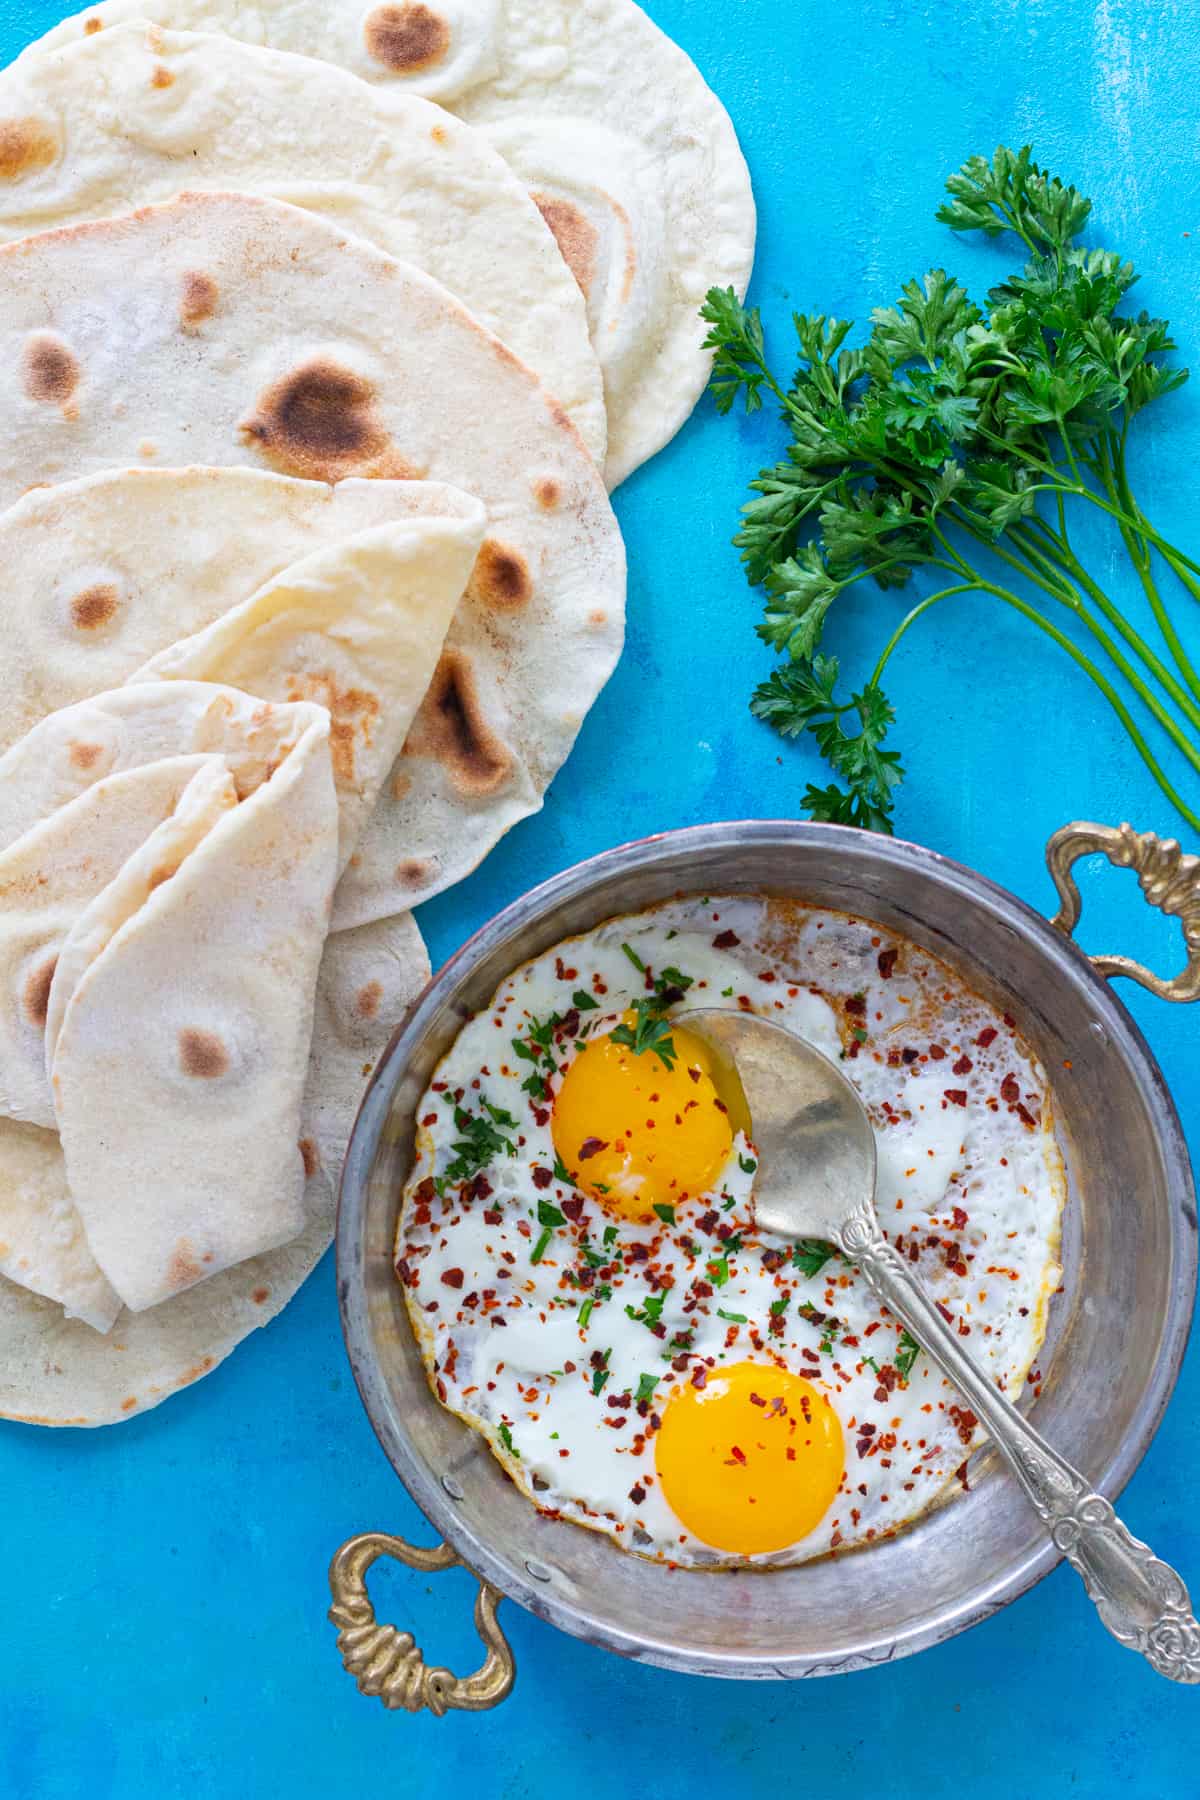
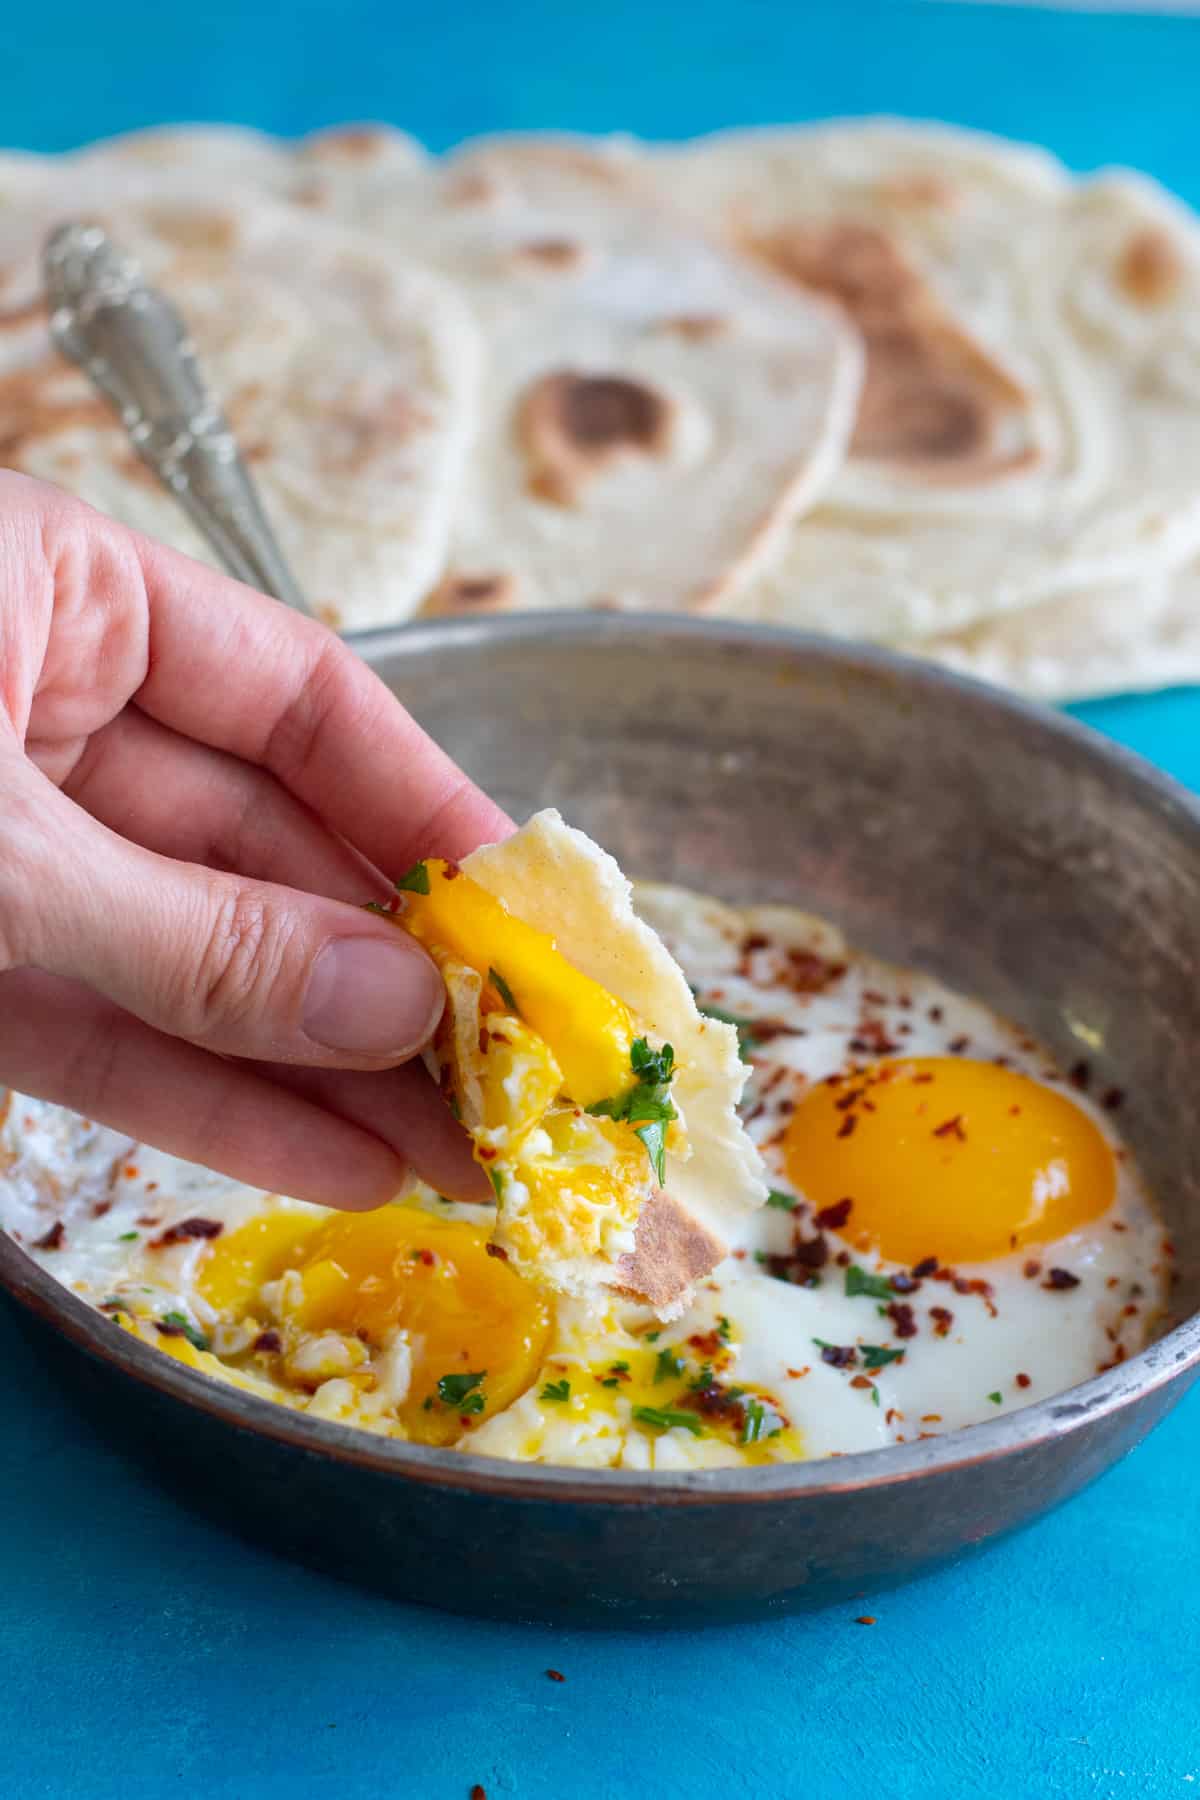
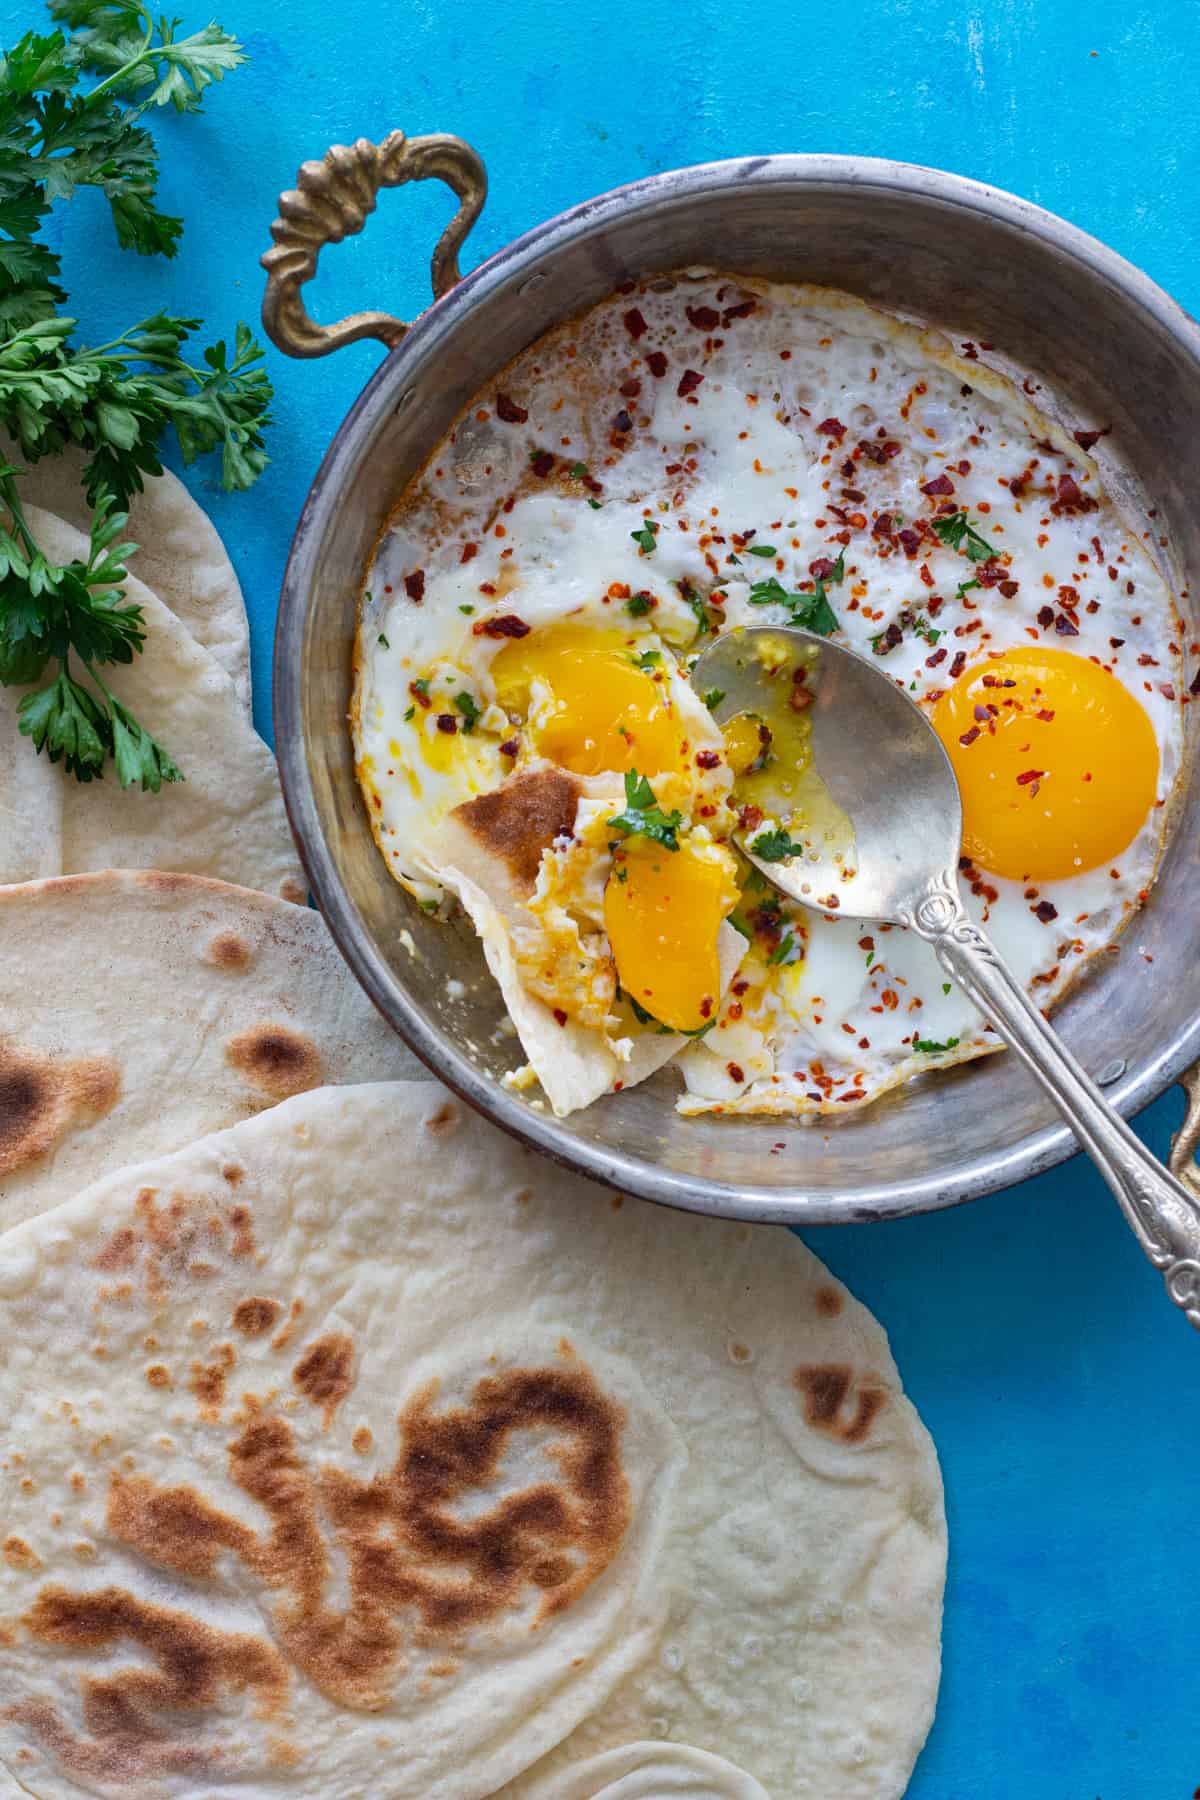
- Serve for breakfast with some fried eggs, cheese, labneh, jam or butter. It also goes well with dishes such as Cilbir (Turkish poached eggs in yogurt sauce), Persian haleem, or nargesi (Persian eggs and spinach).
- Make a wrap with lavash, some kind of protein such as shish kabob, shish tawook, beef shawarma, chicken skewers, doner or joojeh kabab, greens, onions and tomatoes. You can also try delicious classics like kofta kebab or Adana kebab wraps, perfectly spiced and packed with bold flavor, all rolled into soft lavash.
- Serve it on the side or soups and stews such as Moroccan chickpea stew or Mediterranean lentil soup.
Storage
This is a homemade bread which means it doesn’t contain any preservatives and, therefore, it won’t keep forever. Lavash keeps well for about two days in a bread bag at room temperature and then for up to a week if refrigerated.
Frequently Asked Questions
Flatbread is usually crispy whereas lavash is softer and can easily be folded. Lavash is also thinner than flatbread and is usually shaped into a circle.
The main reason for a dough not doing well is because of the yeast not being activated. If the liquid is too hot or too cold, the yeast will not activate. The ideal temperature is between 115°F and 120°F.
Lavash dries out easily therefore it’s best to keep it in a bread bag or a ziploc bag. However, if it dries a bit, sprinkle with just a few drops of water and then microwave for 10 seconds.
Classic lavash recipe uses yeast, however, you can make this no yeast flatbread that’s pretty similar to lavash in texture.
Yes, however, you have to make sure you’re using 1:1 gluten-free flour.
Lavash has a mild, slightly yeasty flavor with a soft, chewy texture. It’s not as bland as a tortilla since it gets a subtle, rich flavor from the milk in the dough. Yet, it’s neutral enough to pair with many different fillings, which is one reason why it’s a popular choice for wraps.
More Bread Recipes
Did you make this recipe? I’d love to hear about it! Please comment and leave a 5-star🌟 rating below. You can also follow us on Instagram, Facebook, Pinterest or subscribe to our newsletter to get a free e-Cookbook!
Lavash Bread
Ingredients
- 3/4 cup warm water
- 3/4 cup warm milk
- 1 tbsp vegetable oil , or other neutral flavored oils
- 1/2 tbsp granulated sugar
- 1 tsp salt
- 1 tbsp instant yeast
- 3 1/2 cup all purpose flour, plus more for dusting the surface
Instructions
- In a large bowl mix water, milk, oil, sugar, salt and instant yeast.
- Slowly add in the flour and mix using your hands or stand mixer until the dough comes together. This would take between 8 to 10 minutes. The dough will be a bit sticky.
- Rub a bit of oil all over the dough and place it in a large bowl. Cover and let it rise for 40 minutes. (I usually let mine rise in an "off" oven)
- After 40 minutes, gently deflate the dough and divide it into 10 pieces. shape each piece into a ball. Cover them all with a kitchen towel so they don't dry as you cook them. Let the dough balls sit for 15 minutes as you heat the pan.
- Heat a nonstick pan over medium heat. Flour your surface and your rolling dough very well. Place a dough ball on the surface and roll it out to be very thin.
- Place it on the hot pan and cook for 45 seconds to one minute. There will be bubbles. Flip and cook on the other side for about 30-45 seconds. Place the bread on a plate and cover with a kitchen towel.
- Repeat with the remaining dough.
Notes
- Make sure the water and milk are not too hot or too cold. If they are too hot, the yeast would die and if too cold, the yeast won’t activate. The ideal temperature is between 115°F and 120°F.
- Lavash dries out easily therefore it’s best to keep it in a bread bag or a ziploc bag. However, if it dries a bit, sprinkle with just a few drops of water and then microwave for 10 seconds.
- Make sure you dough is kneaded well. It should feel supple and soft but not too sticky. Avoid adding more flour than what is intended in the recipe.
- It’s important to keep a towel on the dough balls while rolling them out one by one. If not covered with a towel, the balls will develop a hard surface which would prevent the bread from bubbling.
- Keep a plate and a kitchen towel on the counter for the lavash breads that are cooked. Place each cooked lavash on the plate and immediately cover with a towel to avoid drying out. You can stack them.
Nutrition
Nutrition information is automatically calculated, so should only be used as an approximation.


Just made this recipe and my kids loved i loved it too, so easy and quick… i have a question about the nutrition value so its based on 1 bread (if i made 9 balls each 100g how can i know the calories?) hope you can help me 🥰
It would be about 190cal, we use a plugin to calculate the nutrition facts that it’s possible that this wouldn’t be 100% accurate.
Thank you for this recipe!
I just tried for the first time and encountered some problems.
I followed exactly the steps and the quantities, the only modification I did is, as suggested, to substitute some AP flour (one-third) for wholewheat flour.
After having let chill the dough for about one hour (covered as recommended), I was about to divide the dough into 20 pieces but the boule was still so sticky that I could barely manipulate it, although it had doubled in volume thanks to the correct fermentation, and although I had kneaded it energetically for more than 10 minutes (in the previous step), I don’t know at all what is the reason to this, maybe because of the wholewheat included?
Also, I had a big concern about the size of each piece, I found it very very small, the best diameter I could achieve for having a 2mm thickness, was about 5-6 inches. I’m used to much bigger ones, so to those like me, I would recommend dividing the dough into 8 pieces max to have 15 inches pieces of bread with about 2mm of thickness.
Please let me know if you spotted what I’m doing wrong and why my dough was still so sticky, I want to try this recipe again but I don’t want to waste ingredients and make the same mistake again.
Also, to the author of the recipe, I would be very grateful if you could tell me the expected diameter/thickness when you divide your dough into 20 pieces.
Thank you!
Hi Bill, thank you for your comment. The stickiness of the dough could be related to measuring the flour. Please check out this article: https://sugarspunrun.com/how-to-measure-flour/
As for the size, yes, these would give 20 lavash, each as big as a regular pan, about 10 inches. If rolling out gets tricky and the dough keeps shrinking, let it rest for a bit more and try again. Hope this helps.
This was my first time making this bread and it came out great. Your directions and recipe were easy to follow. I will be making this often!
So easy to make and absolutely delicious! Can’t wait to make again. Thank you! 🙂
LOVED it! So easy to make and deliciously soft, perfect for rolling delicious fillings in! Thanks!
These are some great tips and tricks!; Looking forward to giving this a try; definitely too good to pass up, indeed!
I love lavash bread but I had no idea how easy it was to make it from scratch at home! Can’t wait to try this soon!
This Lavash bead looks delicious delicious and easy to make it too. I will try sourdough version of it.
We are maximum 2-3 people (small family) and to make 20 is to much can you possible provide the quantities for 4-6 lavash..I am looking forward to a response please. Many thanks. Sorry for the bother.
This makes 20 pretty small lavash breads (about 10 inches each) and you can refrigerate them if needed. However, you can also use divide the measurements in half.
Made this last night, it came out so delicious. I’m in Hawaii now where so do not have access to Lavash. The only thing I had problems with is after it was thinned (I used a tortilla press) as soon as I picked it up to put on the hot griddle, it shrunk up significantly and I couldn’t keep it thin. Although delicious, It ended up more of the thickness of pita. Do you have any advice to keep it then?
Thanks! I’ll be making this again!
Hi Amanda, there are 2 reasons for shrinking: the dough didn’t rest enough for the gluten to form or the tortilla press. Maybe rolling out using a rolling pin would keep the shape better!