How To Make Yogurt In Instant Pot
Apr 29, 2021, Updated Apr 17, 2026
This post may contain affiliate links.
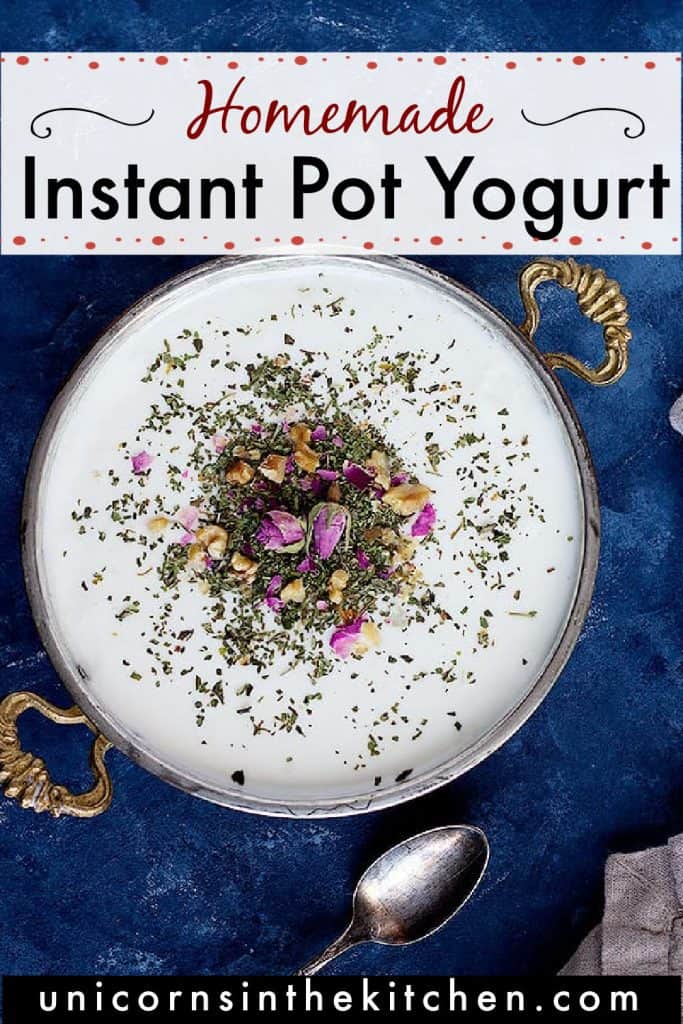
If you’ve ever wanted to make creamy, homemade yogurt with minimal effort, this instant pot yogurt recipe is for you! With just two ingredients, you can create a delicious and healthy homemade yogurt and ditch the store-bought stuff!

If you own an Instant Pot, you probably know how convenient it is. I love mine, especially for making yogurt—it’s a simple recipe that’s mostly hands-off.
Growing up in Iran, yogurt was an inseparable part of my life, and I still use it every day in one way or another. Sometimes we use it to make creamy cucumber salad or a refreshing ayran (Turkish yogurt drink) to have with some kebob. on hot summer days, we use it to make abdoogh khiar (cold yogurt soup) which is nonnegotiable and in winter, a bowl of Turkish yogurt soup (yayla corbasi) is what we all crave. So when I figured out that I can make yogurt in my instant pot, I knew it would turn into a routine in our house!
Why Make Yogurt at Home?
Yogurt is a staple in Persian, Middle Eastern and Mediterranean cuisines, often served as a creamy dip or refreshing side dish, like tzatziki or mast-o khiar, alongside hearty main courses. While it might seem like making yogurt at home is tricky, the Instant Pot makes it surprisingly simple.
With just a few minutes of prep, you can have homemade yogurt that’s naturally sweeter and less tangy than store-bought. Not only is it more affordable, but the texture is also incredibly smooth and creamy—no need for added thickeners! Though the process takes several hours, most of that time is completely hands-off, making it an effortless way to enjoy fresh, homemade yogurt anytime and in any way. Imagine making your morning yogurt parfait with berries and honey using your homemade yogurt, it would be amazing!

Ingredients
You only need two ingredients to make yogurt at home. Please read through to learn all the details.
Milk: I have tried making instant pot yogurt using milk with different fat content and the result is that you can make the best instant pot yogurt using whole milk. Please don’t use skim milk as it will result in yogurt that’s not flavorful and has a pretty runny texture.
Starter: To make homemade yogurt, you’ll always need a starter—a source of live bacterial cultures to kickstart the fermentation process. The easiest option is to use store-bought plain yogurt with live active cultures, which you can find by checking the ingredient list on the container. Make sure to avoid flavored yogurts, such as vanilla or fruit-infused varieties, as they often contain additives that can interfere with fermentation.
Your yogurt is only as good as your starter, so get high quality whole milk yogurt to make your first batch. Once you’ve made your first batch of Instant Pot yogurt, save 1/4 cup to use as a starter for your next batch, ensuring a continuous supply of fresh, homemade yogurt!
How To Make Yogurt In Instant Pot
Step 1: Clean Your Instant Pot
If you cook a lot of chili and stews in your Instant Pot, I strongly advise you to take this step. To clean the inner pot of your instant pot, simply wash it in the dishwasher (separate the plastic ring and wash it by hand separately). Once the pot, the ring, and the lid are dry, place the ring in the lid again and wash the pot once more only with hot water. Dry the pot and put it in the instant pot.
Step 2: Heat the Milk
Pour the milk into the pot and seal the lid on the instant pot. It doesn’t matter if you set the valve on sealing or venting since the instant pot won’t be using pressure. Press the yogurt function on the instant pot until the screen shows “boil”. Let the instant pot do its work and heat the milk. This will take about 60 to 90 minutes.
Step 3: Cool the Milk and Add the Starter
Once the milk is heated, your instant pot will beep. Take the inner pot out and immediately put it into an ice water bath (a large bowl filled with ice water) and place an instant read thermometer in the milk. Slowly whisk the milk until the temperature reads at 110ºF. Alternatively, you can leave the pot on the counter and let the milk cool down, but that will take longer.
If the milk has formed a “skin”, remove it. Take out 1/2 cup milk and stir it into the starter yogurt. Add the starter and milk back to the pot and whisk gently without touching the bottom of the pot.
Step 4: Incubation
Return the pot into the instant pot and press the yogurt button again. Adjust it to 8 hours and let the instant pot start the incubation process. After 8 hours, your yogurt is set and ready to be stored.

Turn It Into Greek Yogurt!
The yogurt you make at home might be a bit runnier and smoother than store-bought and the reason is that homemade yogurt does not contain any kind of stabilizer. Now if you’d like your homemade instant pot yogurt to have the same texture as Greek yogurt, here is how to do it:
- Place a strainer on top of a bowl.
- Line the strainer with two layers of cheesecloth.
- Pour the yogurt into the strainer and let the whey drip out for at least one hour. If you like denser yogurt, you can leave the yogurt and strainer in the bowl in the fridge for the whey to drip for up to 8 hours. The longer the yogurt strains, the thicker it will be.
- Once the yogurt has reached your desired consistency, whisk it and store it. This yogurt is going to be smooth and quite dense.

Storage
Yogurt is alive and needs immediate refrigeration. The longer the yogurt stays, the tangier and looser it’ll become. Homemade instant pot yogurt keeps for about ten days in the fridge. Make sure to store your homemade yogurt in glass jars or containers for the best result.

Recipe Tips
- I don’t strain my yogurt unless I want it thick like Greek yogurt. If you prefer a creamier texture, you can skip this step entirely.
- You need an instant-read thermometer to make yogurt at home. This is because the temperature of the milk should reach between 105ºF and 110ºF and that’s exactly when you should add the starter to the milk.
- If you love tangier yogurt, simply increase the incubation time to 10 hours instead of 8—the longer it incubates, the tangier it gets.
- Once you’ve made your first batch, save 1/4 cup of your homemade yogurt as a starter for your next batch. It keeps getting better with every batch!
Frequently asked questions
It takes about 90 minutes for the yogurt to warm up and then cool down to add the starter. And then another 8 hours is required for fermentation. Therefore making yogurt at home is a 10-hour process that is almost completely hands-off. You will know the yogurt is done once it’s a whole mass in the instant pot and it’s dense. The texture of a ready yogurt is dense and not runny.
I have not tried using non-dairy milk to make yogurt. However, after some research, I figured out that people have found success using coconut milk to make yogurt in the instant pot. Here is a recipe on Epicurious on how to make instant pot cultured coconut milk yogurt.
Many say it’s possible to freeze homemade yogurt. However, just because it’s possible, doesn’t mean it’s a good idea. When yogurt is frozen, it develops an acid-like flavor that’s not pleasant. Moreover, the texture changes and it becomes grainy.
There could be a few reasons that the yogurt didn’t set. One could be that the starter yogurt you used didn’t contain active bacterial cultures. Another reason could be that the yogurt didn’t heat enough in the instant pot or got too cold before adding the starter.
It’s called whey. It’s very normal for homemade yogurt to release that. Some use whey in place of buttermilk in baking but I’ve never tried it myself.
More Recipes with Yogurt

Summer Recipes
Abdoogh Khiar – Persian Cold Yogurt Soup

Fall Recipe
Turkish Yogurt Soup (Yayla Çorbasi)

Mediterranean recipes
Cacik Recipe Turkish Yogurt and Cucumber

Persian Recipes
Spinach Yogurt Dip Persian Style (Borani Esfenaj)
Did you make this recipe? I’d love to hear about it! Please comment and leave a 5-star🌟 rating below. You can also follow us on Instagram, Facebook, Pinterest or subscribe to our newsletter to get a free e-Cookbook!

How To Make Yogurt In Instant Pot
Instructions
- Make sure your instant pot (the inner pot, the lid and the ring) is completely clean. Rinse the inner pot with hot water and dry it. Place it back in the instant pot.
- Pour the milk into the instant pot and adjust the lid. The valve can be either on sealing or venting.
- Press the yogurt button on the instant pot and adjust it so the screen reads "boil".
- Let the instant pot heat the milk. This will take about 60 to 90 minutes. Once it's ready, the instant pot will beep.
- Take the lid off, and place the inner pot into an ice bath (a large bowl filled with ice water.
- Place an instant read thermometer into the milk and read the temperature. It should show around 170 -180F.
- Slowly stir the milk until the thermometer reads between 105 and 110F.
- Take out 1/2 cup of the milk and mix it with 1/4 cup yogurt.
- Return the yogurt and milk mixture back to the milk in the pot and stir.
- Place the inner pot into the instant pot again (dry the pot first).
- Press the yogurt button again and adjust it to 8 hours.
- Let the instant pot do its work and once the 8 hours is finished, your yogurt is ready.
- Cool for an hour in the fridge and then store it in glass or plastic containers.
Notes
- If you would like to make Greek yogurt, you need to strain the instant pot yogurt:
-
- Place a strainer on top of a bowl.
- Line the strainer with two layers of cheesecloth.
- Pour the yogurt into the strainer and let the whey drip out for at least one hour. If you like a denser yogurt, you can leave the yogurt and strainer with the bowl in the fridge for the whey to drip for up to 8 hours.
- Once the yogurt has reached your desired consistency, whisk it and store it. This yogurt is going to be smooth and quite dense.
- Your yogurt is as good as your starter, therefore make sure to get quality yogurt.
- You can sweeten the yogurt before serving with some honey or maple syrup.
Nutrition
Nutrition information is automatically calculated, so should only be used as an approximation.


Hi, I have a pressure cooker which I have successfully used for a variety of instant pot recipes… not sure about this one though, do you think it would be possible to make yoghurt in a pressure coooker? Thanks in advance 🙂
Does your pressure cooker have the same features as the instant pot? If so, I think it’s possible to make it.
Tried this recipe as I wanted to make yogurt in my Instant Pot and it worked perfect. Thanks so much for sharing!
This was one of the few things I hadn’t yet tried in my IP bc it seemed intimidating. Thanks to this easy recipe and explanation – my first batch came out great!
This was so easy to make! I was nervous but with all the instructions being spot on it really turned out perfect. Making this again soon!
Glad you like this yogurt recipe!
Perfect tutorial! Makes the process seem way less intimidating and turns out great!
I tried making this over the weekend and it turned out perfectly! Can’t wait to make it again!
Another fabulous reason to dust off my Instant pot! Appreciate the easy to follow directions and suggestions. Can’t wait to try it!
Hope you enjoy this IP chicken recipe!
I’m never making yogurt any other way again! The Instant Pot makes it SO easy!