Homemade Pita Bread Recipe
Sep 11, 2020, Updated Apr 20, 2026
This post may contain affiliate links.
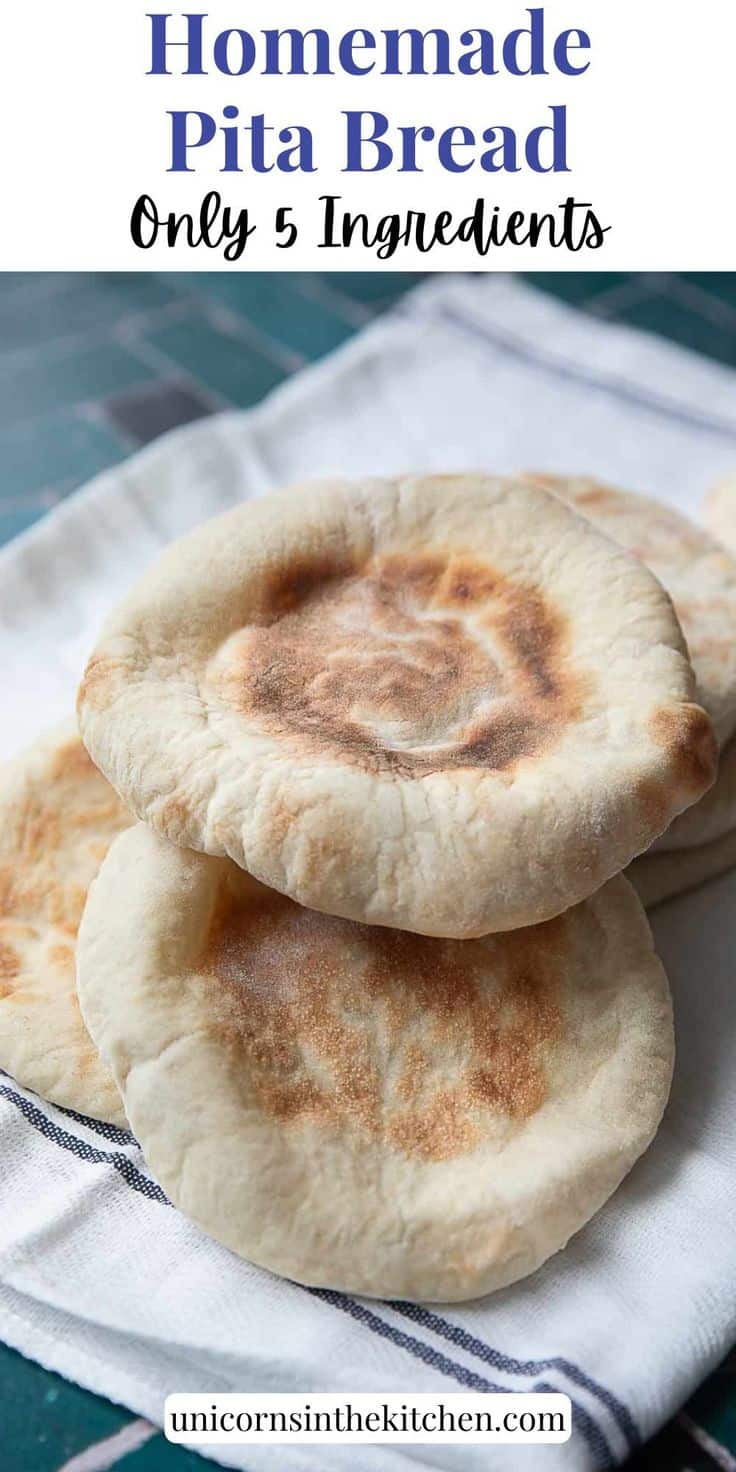
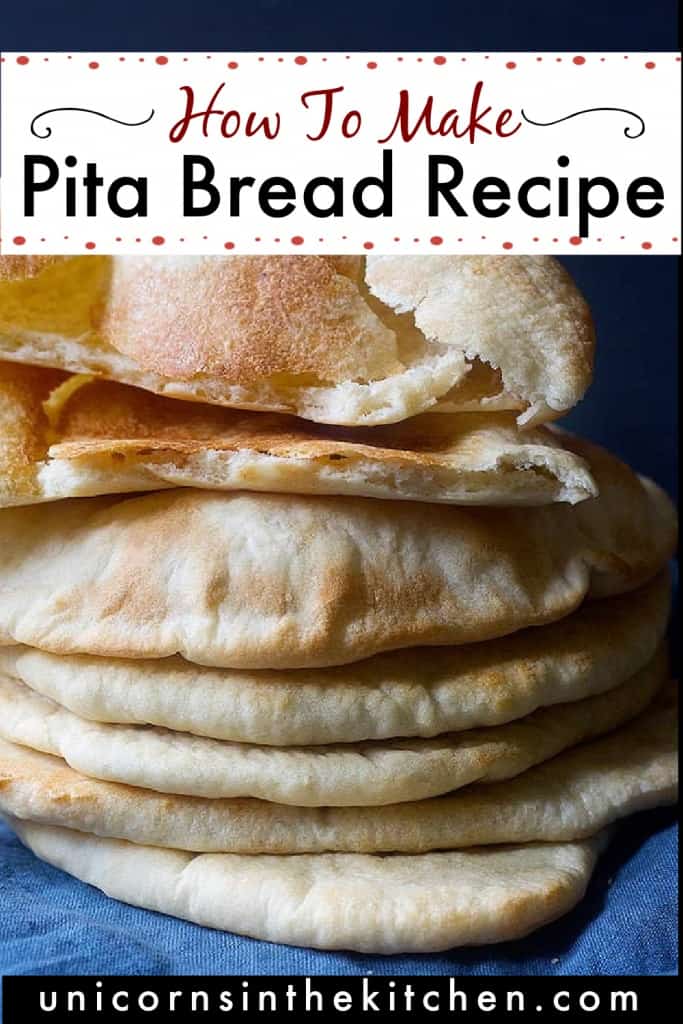
Homemade pita bread is soft, slightly thick and holds its fillings in a way that store-bought pita simply doesn’t. Made with all-purpose flour, instant yeast and olive oil, this recipe is beginner-friendly, vegan, and ready in just over an hour.
You can bake it in the oven on a pizza stone or cook it on the stovetop in a pan. Either way, you’ll get puffy, pillowy pita bread that’s good for dipping, stuffing or eating alongside your favorite Middle Eastern and Mediterranean dishes.

I make pita at home regularly and serve it with everything from kofta kebab and chicken kebab to simple cheese and herbs. Once you try it fresh from the oven or pan, the store-bought version feels like a different product entirely. I’ve found that homemade pita is thicker, softer and has a chewy texture that you won’t find in pita bread that has been sitting in a sealed bag on a supermarket shelf.
Ingredients

All-purpose flour: Gives the pita the right balance of strength and softness. It puffs reliably at high heat and stays tender once baked.
Instant yeast: No proofing needed, which makes this recipe quick and straightforward. If you only have active dry yeast, dissolve it in the warm water with a pinch of sugar first and wait 5 to 10 minutes before proceeding.
Granulated sugar: A small amount that feeds the yeast and helps the dough rise properly.
Salt: Enhances flavor and strengthens the gluten structure, giving the pita its characteristic chew.
Extra virgin olive oil: Keeps the dough soft and pliable and adds a subtle richness to the finished bread.
Warm water: Should be warm to the touch, around 110°F. Too hot kills the yeast; too cold and the dough won’t rise properly.
How To Make Pita Bread (Oven and Stovetop)
Oven Method
Make the dough: Place the flour, instant yeast, sugar and salt in the bowl and whisk to combine. Pour in the olive oil and warm water and mix with your hands for 5 to 7 minutes until the dough is smooth and slightly tacky. It should come away from the sides of the bowl cleanly. You can do this using a stand mixer and its dough hook.

First rise: Shape the dough into a ball and place it in a lightly oiled bowl. Cover with a clean kitchen towel and let it rise for one hour until doubled in size. Do not punch the dough down after rising. The air inside is what creates the pocket.


Divide and rest: Place a pizza stone or baking sheet in the oven and preheat to 500°F. Divide the dough into 8 equal pieces, cover with a towel and let them rest for 15 minutes. This rest makes rolling much easier.

Roll out: Take one dough ball and keep the rest covered. Press gently with your fingers to flatten it into a round disk, then use a rolling pin to roll it out to no thicker than ¼ inch. The key here is to roll the pin over the dough without applying downward pressure. Let the weight of the rolling pin do the work. Pressing down will push the air out and the pita won’t puff.

Bake: Place the rolled disk directly onto the hot pizza stone or baking sheet and close the oven door. Bake for 2 minutes until the bread puffs up, then flip and bake for another minute. The pita should be lightly golden but still soft.
Keep warm: Place the baked pita on a plate and cover immediately with a clean kitchen towel. This traps steam and keeps the bread soft. Continue baking the remaining dough balls one at a time, rolling out the next one while the previous is in the oven.


Stovetop Method
The stovetop method is great when you don’t want to heat up the oven or when you’re making a small batch. The result is slightly more charred on the surface, which adds a nice flavor. Follow the same dough preparation and rising steps above, then:
- Heat a cast iron skillet or heavy-bottomed pan over high heat for at least 3 to 4 minutes until very hot. The surface must be extremely hot before the pita goes in, both for the oven and stovetop methods. A surface that isn’t hot enough is the most common reason pita doesn’t puff.
- Roll out one dough ball to ¼ inch thickness using the same gentle rolling technique described above.
- Place the rolled dough in the dry pan with no oil. Cook for about 1 to 2 minutes until bubbles form and the underside has dark spots. Flip and cook for another minute on the other side. The pita should puff up in the center.
- Remove and cover with a towel immediately. Continue with the remaining dough balls.
Recipe Tips
The hot surface is everything. Whether you’re using the oven or stovetop, the surface must be extremely hot before the dough goes on it. This is what creates the sudden burst of steam inside the dough that causes the pita to puff. Preheat your pizza stone, baking sheet or pan for at least 3 to 4 minutes before baking the first one.
Roll gently. When rolling out the dough, let the weight of the rolling pin do the work. Don’t press down. Any pressure forces the air out of the dough and the pita won’t form a pocket. A light touch makes all the difference.
Don’t skip the rest after dividing. Letting the dough balls rest for 15 minutes after dividing relaxes the gluten, which makes rolling much easier. If you try to roll immediately the dough will spring back.
Cover immediately after baking. As soon as each pita comes out of the oven or pan, cover it with a towel. This traps steam and keeps the bread soft and pliable. Pita that cools uncovered goes hard quickly.
Knead for the full 5 to 7 minutes. Proper kneading develops the gluten structure that allows the pita to puff and hold its shape. Under-kneaded dough produces flat, dense bread.
How to Serve Pita Bread
Pita is one of the most versatile breads in Middle Eastern and Mediterranean cooking. It works well as part of a mezze spread alongside loaded hummus, baba ganoush and labneh.
For stuffed pita pockets, chicken shawarma is the classic pairing. The soft, thick pocket holds the meat and sauces together in a way a thinner store-bought pita can’t. Homemade falafel is another natural fit. Add toum for a garlicky kick or pickled turnips for brightness.
Leftover pita that’s gone slightly stale is perfect for pita chips, which are great for fattoush salad or scooping up hummus.

Storage
Store at room temperature in an airtight bag or container for up to 2 days. You can keep it in the fridge wrapped tightly in plastic wrap for up to a week and warm it in the oven at 300°F for a few minutes before serving.
For longer storage, freeze individual pitas separated by parchment paper and wrapped in foil. Thaw at room temperature and reheat in a 250°F oven wrapped in foil for 10 to 12 minutes.
Frequently Asked Questions
The most common reason is that the surface wasn’t hot enough when the dough went on. Make sure your pizza stone, baking sheet or pan is thoroughly preheated. The second most common reason is too much pressure when rolling, which pushes the air out of the dough.
I recommend sticking to all-purpose for the best results. If you want to add some whole wheat, replace no more than one cup of the all-purpose flour with whole wheat. Using all whole wheat will give you a denser, heavier pita that may not puff as well.
Yes. Wrap it in a damp kitchen towel and heat in the oven at 350°F for 7 to 10 minutes. The steam revives the texture.
Did you make this recipe? I’d love to hear about it! Please comment and leave a 5-star🌟 rating below. You can also follow us on Instagram, Facebook, Pinterest or subscribe to our newsletter to get a free e-Cookbook!

Homemade Pita Bread Recipe
Ingredients
- 2¾ cups all purpose flour
- 2 teaspoons instant yeast
- 1 teaspoon granulated sugar
- 1 teaspoon salt
- 3 tablespoons olive oil , extra virgin
- 1 cup warm water
Instructions
- Put flour, yeast, sugar, and salt in a stand mixer and mix.
- Add olive oil and water. Mix until the dough is formed. It can be a little sticky. Add a little flour if needed.
- Cover and rest for 1 hour so the dough is doubled in size. Do not punch the dough down.
Oven Method:
- Preheat the oven and a pizza stone to 500℉.
- Divide the dough into eight pieces and cover for 15 minutes to rise.
- Take one dough ball and keep the rest covered.
- Use your fingers to shape the dough into a disk and don't let the air out. Gently roll out the dough using a rolling pin. The disk shouldn't be thicker than ¼ inch.
- Place the rolled disk on the hot pizza stone (or baking sheet) and close the oven door. Let it bake for two minutes, it will puff.
- Flip the bread and bake for another two minutes.
Stovetop Method
- Heat a cast iron skillet or heavy-bottomed pan over high heat for at least 3 to 4 minutes until very hot. The surface must be extremely hot before the pita goes in, both for the oven and stovetop methods.
- Roll out one dough ball to ¼ inch thickness using the same gentle rolling technique described above.
- Place the rolled dough in the dry pan with no oil. Cook for about 1 to 2 minutes until bubbles form and the underside has dark spots. Flip and cook for another minute on the other side. The pita should puff up in the center.
- Place the cooked pita bread on a plate and cover with a towel.
- Continue baking the remaining pita breads.
- Store tightly in a plastic bag.
Video
Notes
- Use Warm Water: Make sure to use warm water (around 110°F) to activate the yeast. If it’s too hot, it can kill the yeast; too cold, and the dough won’t rise as well.
- Let the Dough Rest: After dividing it into portions, allow the dough to rest for 15 minutes. This will make rolling out the pita easier, ensuring an even texture.
- Bake on a Hot Surface: For the best pita puff, bake it on a hot surface like a pizza stone or a preheated baking sheet. Make sure that the surface is thoroughly heated to achieve that perfect crispy exterior and soft inside.
- Cover Baked Pita: Once the pita is baked, place it under a towel to keep it soft and prevent drying out. This will maintain the pillowy texture of the pita.
- Handle the Dough Gently: Once the dough has doubled in size after one hour, don’t punch it down. The dough needs the air to puff and be hollow in the middle. While rolling, make sure you’re not pressing the rolling pin on the dough; but roll it on the dough without much pressure.
- Bake One at a Time: This recipe yields 8 pita breads. To maintain their quality, I baked them one by one, rolling out one while waiting for the other one to bake. You can do two at a time, these don’t take much time to bake anyway.
Nutrition
Nutrition information is automatically calculated, so should only be used as an approximation.
More Bread Recipes

Turkish Recipes
Turkish Pide Bread (Ramazan Pidesi)

Breads
Easy No-Yeast Flatbread
Breads


This recipe looks absolutely delicious! How long do you recommended kneading the dough in the stand mixer?
I would say about 5 to 7 minutes!