This post may contain affiliate links.

Kibbeh is a Middle Eastern meatball made with bulgur, ground beef, and warm spices. The best kibbeh is known for its crispy yet tender shell encasing a flavorful spiced meat filling. Learn how to perfect this classic dish with my step-by-step tutorial and video.

I love Middle Eastern food, not only for the memories of my childhood in Iran that it carries but also because of its incredible flavors. From falafel and kofta kebab to mujadara, toum, and shish kabob and everything in between, Middle Eastern cuisine is truly delicious!
Today, I’m excited to share one of the region’s most beloved recipes called kibbeh, traditionally made with ground beef or lamb, fine bulgur, onions, and aromatic spices.
What Is Kibbeh?
Kibbeh, also known as kubbeh, kibie, quibe, or kubba, is a classic Levantine dish made with bulgur, ground meat (typically lamb or beef), and aromatic Middle Eastern spices like allspice and cinnamon. The name “kibbeh” comes from the Arabic word meaning “ball-shaped,” reflecting its traditional form.
This dish can be prepared in different ways, with frying and baking being the most popular methods. Both of which are covered in this tutorial with a step-by-step video. Often described as Middle Eastern meatballs or Lebanese stuffed croquettes, kibbeh is a flavorful introduction to the rich culinary traditions of the region.
Kibbeh Ingredients

For the Shell
- Bulgur: You need fine bulgur for the shell, not the coarse variation. Coarse bulgur won’t stick to the ground meat, causing the meatball to fall apart.
- Spices: We need salt, pepper, paprika, dried mint, and cumin. You can also use Lebanese seven spice to flavor this dish.
- Ground beef: I usually use ground beef that’s 90% lean. You can use ground lamb or a mix of both.
For the Filling
- Pine nuts: These add a nice flavor and texture to the filling. You can leave it out if desired.
- Onions: You can use yellow or white onions for this recipe. The onion should be finely chopped.
- Ground beef: You can also use lamb or a combination of beef and lamb.
- Olive Oil: Adds moisture and enhances the richness of the filling.
- Spices: I use warm Middle Eastern spices including allspice, cinnamon, salt, and pepper.
How to Make Kibbeh
To ensure you’re following the steps correctly, please make sure to watch the video and step-by-step tutorial. I have included the instructions for both the fried and baked versions.
Make the Kibbeh Dough

Place the bulgur in a large bowl and pour water over it. Cover and let it sit for 15–20 minutes until the bulgur absorbs the water.
Add salt, pepper, paprika, dried mint, and cumin to the soaked bulgur. Mix well.
Grate the onion and add it to the bulgur mixture along with the ground beef. Knead well until all the ingredients are fully combined into a smooth dough. You can do this step using a food processor.
Cover and refrigerate for 1–2 hours to firm up the dough.
Expert Tip: To make preparation easier, make sure that the dough is cold at all times. You can either take small portions of the dough and leave the rest in the fridge or place the dough in a large bowl full of ice and work with it.
Make the Filling

Heat olive oil in a large pan over medium heat. Sauté the onion until golden, about 10 minutes.
Add the ground beef, salt, pepper, allspice, and cinnamon. Cook until the beef is fully cooked and browned, breaking it into small chunks as it’s cooking.
Stir in the toasted pine nuts and cook for a minute, then turn off the heat. Set the filling aside to cool.
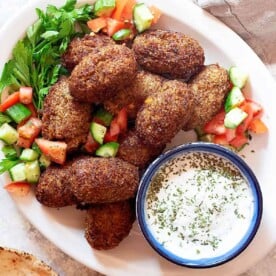
Assemble and Fry

After chilling, remove the kibbeh dough from the fridge and place it on the counter. Divide the dough into egg-sized portions and roll them into balls.
With wet hands, take one dough ball and poke a hole in the center with your index finger. Rotate and shape it into a hollow cylinder with thin walls.
Fill the shell with the filling, then pinch the top together to seal it into an oval or football shape. Repeat this step until you run out of dough. You can shape these balls into football-shaped croquettes, balls, or even patties.
Place the shaped kibbeh on a parchment-lined baking sheet and freeze for 30 minutes to help them hold their shape during frying.
Heat vegetable oil in a saucepan or a frying pan over medium heat. There should be enough oil to fully submerge the kibbeh when frying them.
Once the oil is hot and small bubbles appear, fry the kibbeh balls in batches. Gently turning them to ensure even cooking on all sides. Make sure not to overcrowd the saucepan, otherwise they won’t fry properly.
Fry the balls for about 5 minutes until they’re golden brown on all sides and completely cooked. Remove the fried kibbeh and drain on a paper towel-lined plate to absorb excess oil and keep them crisp.
Tips for Fried Kibbeh
Chill the Dough: Refrigerating the kibbeh dough for at least an hour helps it hold its shape during frying.
Wet Your Hands: Dampen your hands with water when shaping the kibbeh to make the process much easier, prevent sticking, and achieve smooth, thin shells.
Use Thin Shells: A thinner outer layer ensures a crispy texture and prevents the kibbeh from being doughy.
Freeze Before Frying: Freezing kibbeh for 30 minutes helps them stay intact while frying.
Maintain Proper Oil Temperature: The oil should be around 350-375°F. Too hot oil will burn the kibbeh outside, and the inside will stay raw. Too cool oil, kibbeh will absorb excess oil.
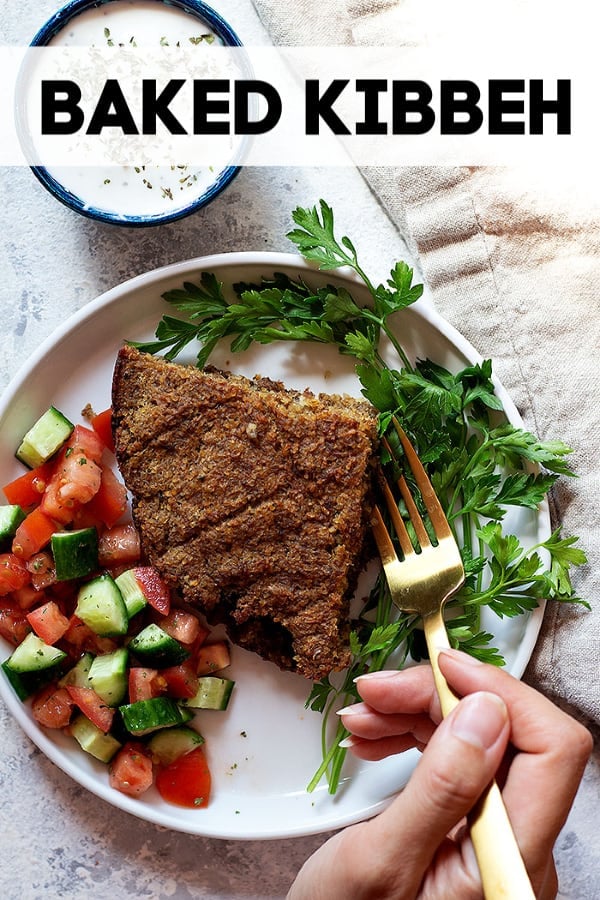
How to Make Baked Kibbeh

Preheat the oven to 400°F. Lightly grease a 9×13 baking dish or a round baking pan with non-stick spray.
Divide the kibbeh dough into two halves. Spread one half evenly across the bottom of the baking dish. It’s easier to spread the dough with wet hands.
Layer the prepared filling over the dough and spread it evenly. With wet hands, spread the other half of the dough on top.
Using a sharp knife, cut the kibbeh into diamond shapes (as shown in the video). Bake for 20–25 minutes until fully cooked and golden brown.
Let the baked kibbeh cool for 10 minutes before slicing and serving with yogurt sauce.
Tips for Baked Kibbeh
Use a Non-Stick Pan: Lightly grease your baking dish to prevent sticking and achieve a crisp crust.
Layer Evenly: Spread the dough and filling in even layers to ensure uniform cooking.
Score Before Baking: Cutting the kibbeh into diamonds before baking helps it cook evenly and makes serving easier.
Brush with Oil or Butter: Lightly brushing the top layer with olive oil or melted butter adds moisture and creates a golden, crispy crust.
Let It Rest: Allow baked kibbeh to cool for 10 minutes before slicing to help it set and hold its shape.

Serving Suggestions
Kibbeh pairs beautifully with fresh salads like fattoush or Mediterranean salad for a refreshing contrast to its rich flavors.
For dipping, try a simple yogurt garlic sauce made with homemade yogurt. Alternatively, opt for tzatziki sauce or tahini sauce for a different twist.
You can also serve kibbeh as part of a mezze platter alongside hummus, muhammara, and baba ganoush, creating a flavorful and diverse spread perfect for sharing.

Variations
Kibbeh comes in many regional variations, each with unique ingredients and preparation methods. One of the most well-known is kibbeh nayeh, a Levantine specialty made with bulgur, finely minced raw lamb or beef, fresh mint, and spices. It is similar to steak tartare.
In Iraq, Kubba Halab is a popular variation that uses rice instead of bulgur, while in Iran, a similar version incorporates tart barberries for added flavor.
Other variations include Kibbeh Aras (disk-shaped kibbeh) and Kibbeh Labanieh, which is simmered in a tangy yogurt and sumac sauce. The city of Aleppo, Syria, is renowned for its kibbeh diversity, offering over 17 different types of this beloved dish.
Make Ahead Instructions
Kibbeh keeps really well and is great to make in advance. You can make the mixture for the shell and the filling up to 2 days in advance, form the kibbeh balls, and fry them when ready.
You can also assemble the baked kibbeh in the tray or pan and refrigerate it for up to 2 days. Bake in the oven according to the instructions in the recipe card.
Storage Tips
Refrigerating:
- Cooked Kibbeh: Store leftover kibbeh in an airtight container in the refrigerator for up to 4 days.
- Uncooked Kibbeh: Keep shaped, uncooked kibbeh in a single layer on a tray, cover with plastic wrap, and refrigerate for up to 24 hours before cooking.
Freezing:
- Freeze Raw Kibbeh: Form and stuff the kibbeh balls as mentioned in the recipe. Put them on a baking sheet lined with parchment paper. Place the baking sheet in the freezer for about 1 hour until they are frozen. Add them in a freezer bag and freeze for up to 3 months. To cook, heat the oil in a pan over medium heat and deep fry the kibbeh balls until golden brown on all sides.
- Freeze Cooked Kibbeh: Let cooked kibbeh cool completely, place them in a freezer bag, and freeze for up to 3 months.
Reheating Tips:
- Fried Kibbeh: Reheat in an oven at 350°F for 10-15 minutes or air fry at 375°F for 5-7 minutes to keep it crispy. Avoid microwaving, as it can make them soggy.
- Baked Kibbeh: Reheat in the oven at 350°F for 15 minutes, covered with foil to prevent drying out.

Frequently Asked Questions
Classic kibbeh is made with either lamb, beef, or a combination of both. Using any other meat won’t work for this recipe.
The bulgur brings the shell together and makes it workable, so leaving it out won’t be possible.
This usually happens if the dough is too dry or if the kibbeh wasn’t chilled before frying. Make sure to knead the dough well, add a little water if needed, and freeze the shaped kibbeh for 30 minutes before frying.
To keep baked kibbeh moist, brush the top with olive oil before baking and cover it loosely with foil for the first 10-15 minutes. Also, avoid overcooking.
Yes, you can use quinoa instead of bulgur to make this dish gluten-free. However, the amount might vary since the consistency is different.

More Lebanese Recipes
All Recipes
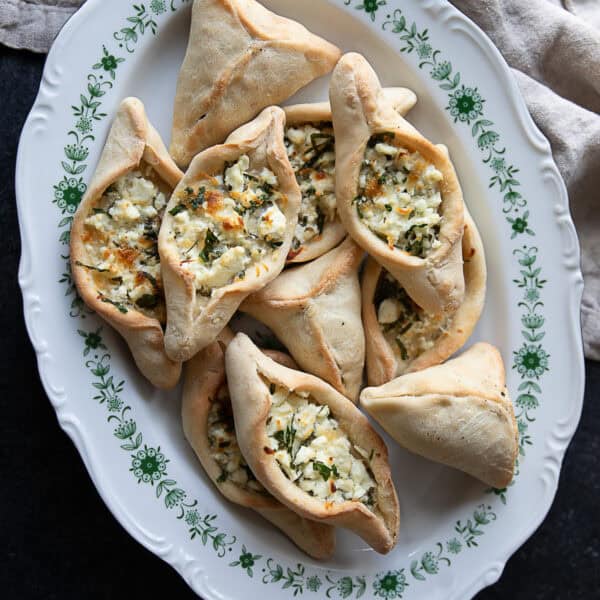
Fatayer (Lebanese Savory Hand Pies)

Mediterranean recipes
Crispy Batata Harra (Spicy Lebanese Potatoes)

Mediterranean recipes
Tabouli Salad Recipe (Tabbouleh)

Mediterranean recipes
Lebanese Rice with Vermicelli
Did you make this recipe? I’d love to hear about it! Please comment and leave a 5-star🌟 rating below. You can also follow us on Instagram, Facebook, Pinterest or subscribe to our newsletter to get a free e-Cookbook!
Kibbeh (Baked and Fried)
Ingredients
Dough
- 2 cups fine bulgur
- 3½ cups water, hot
- 1 teaspoon salt
- ½ teaspoon black pepper
- ½ teaspoon paprika
- 1 teaspoon dried mint
- ½ teaspoon cumin
- 1 large onion
- 1 pound ground beef
- vegetable oil, for frying
Filling
- 1 tablespoon olive oil
- 2 onions, finely chopped
- 1 lb ground beef
- ½ teaspoon salt
- ½ teaspoon black pepper
- ½ teaspoon allspice
- ¼ teaspoon cinnamon
- ¼ teaspoon pine nuts
Yogurt Sauce
- 1 cup yogurt
- ¼ teaspoon salt
- 1 cloves garlic
- 1 teaspoon dried mint
Instructions
Make the dough
- Place the bulgur in a large bowl and pour the water on it. Cover and let it sit for 15 to 20 minutes so the bulgur absorbs the water.
- Add the salt, pepper, paprika, dried mint and cumin to the bulgur and mix well.
- Grate the onion and add it to the bulgur. Add the beef and knead well until fully combined. Refrigerate for one to two hours.
Make the filling
- Heat olive oil in a large pan over medium heat. Saute onion until golden, about 10 minutes.
- Add in ground beef, salt, pepper, allspice, and cinnamon. Brown the ground beef until cooked.
- Stir in the pine nuts. Turn the heat off and set the filling aside.
To make Baked Kibbeh
- Preheat the oven to 400°F.
- Divide the dough in half. Coat a 9×13 baking dish with non stick spray.
- Spread half of the dough in the baking dish. Top with the filling. Spread the other half of the dough on top of the filling. Wet your hands with a bit of water so you can spread the dough easily.
- Using a knife, cut the kibbeh to form diamonds as shown in the video.
- Bake in the oven for 20 to 25 minutes until completely cooked.
- Let the baked kibbeh cool for 10 minutes. Then slice and serve with yogurt sauce.
To make Fried Kibbeh
- After the dough is chilled in the fridge, take it out and place it on the counter.
- Divide the dough into pieces as big as an egg. Shape them into balls.
- Using wet hands, take one of the dough balls and with your index finger, poke a hole into the ball. Rotate the ball so it shapes an empty cylinder with thin walls (as shown in the video).
- Fill the ball with the filling, and using wet hands, bring the top together to seal it. It will look almost like a football.
- If shaping the kibbeh as mentioned doesn't work for you, you can also flatten a dough ball in your hand, place a tablespoon of filling in the middle and then bring the kibbeh together on all sides using wet hands and shape it into a ball.
- Repeat the steps until you run out of kibbeh dough.
- Place all the prepares kibbeh on a baking sheet lined with parchment paper. Freeze for 30 minutes. This will help the kibbeh to stay together when frying.
- Heat enough vegetable oil in a sauce pan to cover the kibbeh when deep frying. The oil should be hot enough that you see small bubbles. But it shouldn’t be smoking or two hot otherwise the kibbeh will burn on the outside and raw on the inside.
- Once the oil is hot, take the kibbeh balls out of the freezer and deep fry them in batches, moving them around gently to make sure they’re fried on all sides.
- Place them on a plate with paper towel to absorb the excess oil.
- Serve warm or at room temperature with yogurt sauce.
Yogurt sauce
- In a small bowl, mix yogurt with salt, minced garlic, and mint.
- Serve with kibbeh.
Video
Notes
- Make sure you’re using fine bulgur and not coarse bulgur to make kibbeh. Coarse bulgur won’t stick to the ground meat, causing the meatball to fall apart.
- You can shape these balls into football shaped croquettes, balls, or even patties.
- To make preparation easier, make sure that the dough is cold at all times. You can either take small portions of the dough and leave the rest in the fridge or place the dough in a large bowl full of ice and work with it.
- Keep you hands wet while shaping the kibbeh balls to make the process much easier.
Nutrition
Nutrition information is automatically calculated, so should only be used as an approximation.


Hi Shadi!
I can’t get fine bulgur here where I live. could I put it in the multi mixer?